Google publishes information on how to disable the automatic updating of Chrome on Windows machines via group policy. That information is not easily to locate on Google’s site, so this article will distill that information into an easily referenced procedure.
In general, allowing Google Chrome to automatically update itself is a good security practice to follow. There are situations, however, where it is undesirable to do so. One specific example is where there are other installed third-party components that require rebuilding after a new Chrome release occurs. For instance, there is a dependency between the Selenium unit test tool and the Chrome web driver. If the Chrome update occurs on a continuous integration server prior to Selenium updating its interface code it could potentially halt the executing of unit tests on the build server.
See Also:
- Turning Off Auto Updates in Google Chrome
- Update fails due to inconsistent Google Update Group Policy settings
- Google Update for Enterprise
Procedure
This procedure assumes that you will be performing Local Group policy changes to a single server and that you have already downloaded the administrative template that Google has created. That template is named GoogleUpdate.adm.
The first step is to open up the Microsoft Management Console (i.e. mmc.exe).

From the File menu select Add/Remove Snap-Ins…. Scroll down the list of Available snap-ins, highlight Group Policy Object, and then click the Add > button.

When you are asked to select the Group Policy Object, select Local Computer, and then click the Finish button.

Back on the Add or Remove Snap-ins dialog, click the OK button.

Expand the Local Computer Policy tree object and then the Computer Configuration object. Highlight Administrative Templates and right-click. Select Add/Remove Templates… from the context menu.

On the Add/Remove Templates dialog, click the Add button.

Navigate to the folder where you stored the downloaded group policy template, GoogleUpdate.adm, and select it from the file dialog. Finally, click the Close button on the Add/Remove Templates dialog.

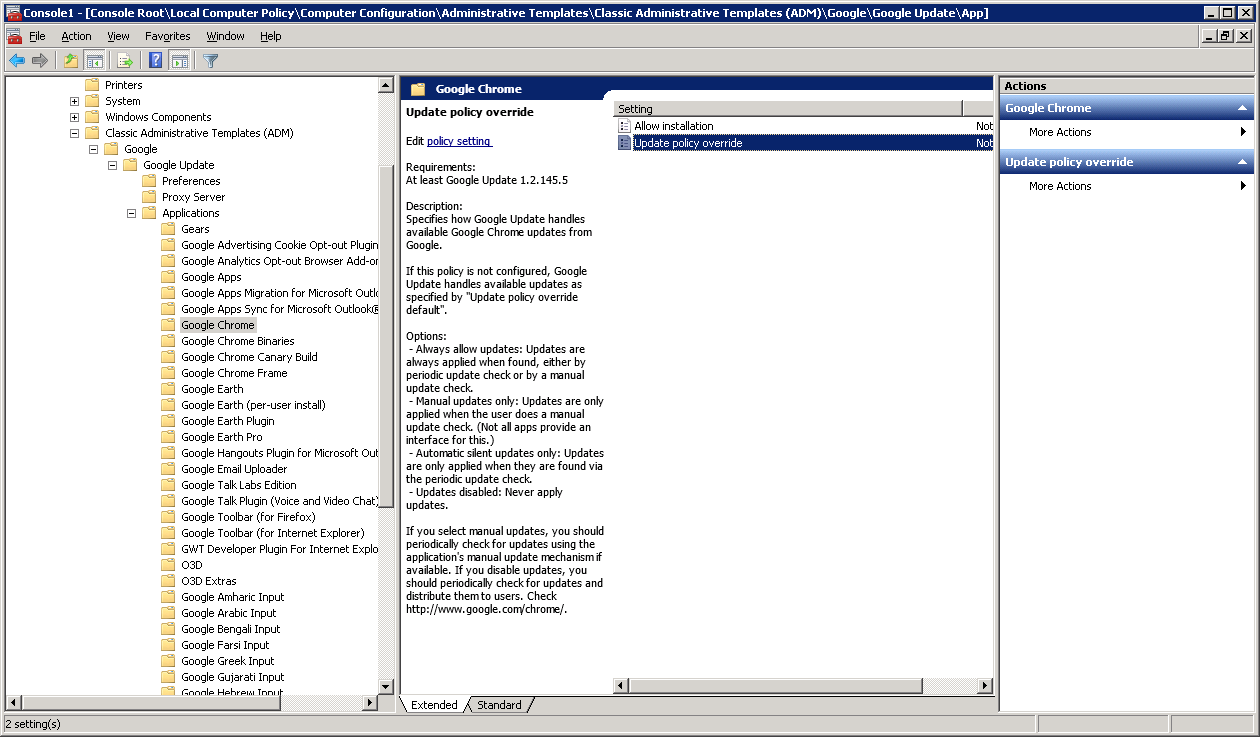
The template will be loaded into a new folder named Class Administrative Templates (ADM) within the Computer Configuration container. Expand this folder, then expand the Google folder, and finally the Applications folder. Locate and select the Google Chrome folder within Appications and double click the Update policy override setting in the middle pane.

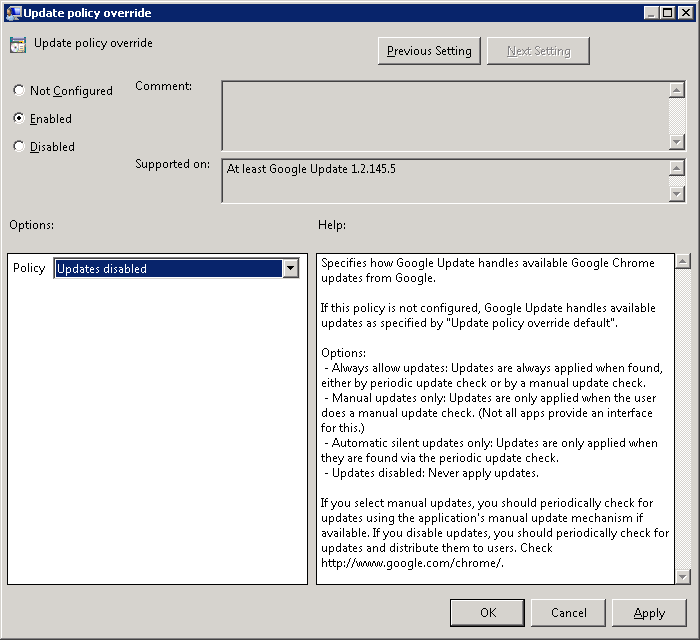
Click the Enable option, select Updates disabled from the Policy option list, and then click the OK button to save your changes. Close out the Microsoft Management Console, optionally saving console as Local Group Policy for quicker access in the future.

The last step is to refresh group policy on the local computer via the following command:
gpupdate /force
In the final image below we can see that updating has indeed been disabled.

NOTE: When you first goto the Chrome About page it will display Updating… making it seem that the update is still occurring. It will spin for a predetermined timeout (a few minutes) and then display the error shown.